Laying Metal Roofing: Installation Process
Summary:
You’re considering metal roofing because you want something that lasts. Maybe you’re tired of replacing shingles every 15 years, or you’ve watched neighbors deal with leak after leak. Metal makes sense—it’s durable, weather-resistant, and can outlast you if installed correctly. That last part matters more than most homeowners realize. The difference between a metal roof that performs for 50+ years and one that fails in 10 often comes down to installation. This guide breaks down the actual process of laying metal roofing, the systems available, and what proper installation really looks like.
Understanding Metal Roofing Systems Before Installation
Not all metal roofing is created equal, and the installation process changes significantly based on which system you choose. Before anyone starts laying metal roofing panels on your home, you need to understand what you’re getting.
The two main categories are exposed fastener systems and concealed fastener systems. Exposed fastener systems, like corrugated or ribbed steel sheet metal roofing, use visible screws that penetrate through the panels directly into your roof deck. These are more affordable and faster to install, but those exposed fasteners become potential leak points over time. Every screw that’s over-tightened, under-tightened, or works loose from thermal expansion creates an opportunity for water infiltration.
Concealed fastener systems, particularly standing seam metal roof systems, hide all fasteners beneath the panels. Clips attach to your roof deck, and panels lock together over those clips. This eliminates thousands of penetration points and creates a cleaner, more weather-tight installation. The trade-off is higher cost and more complex installation requirements.
Steel Sheet Metal Roofing Installation Methods
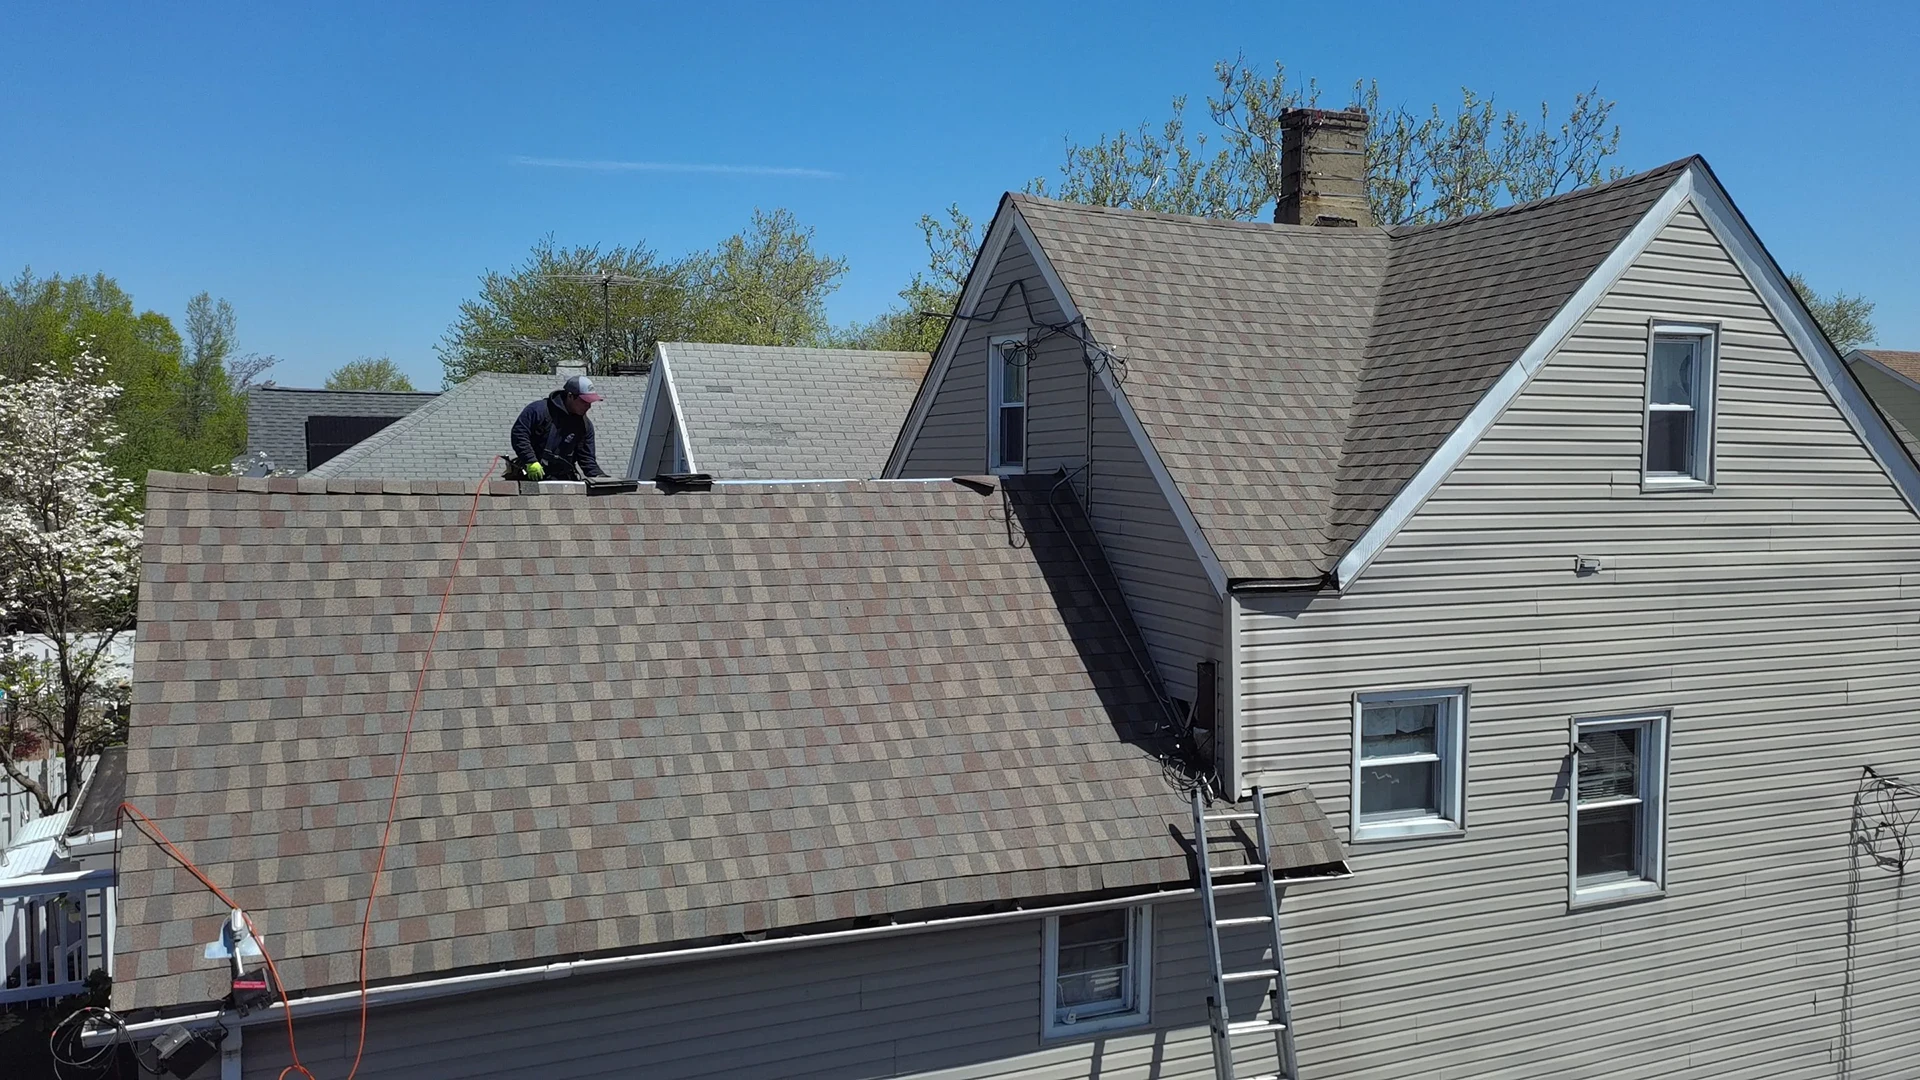
Steel sheet metal roofing typically refers to exposed fastener panels with corrugated, ribbed, or R-panel profiles. These systems have been around for decades, particularly on agricultural and commercial buildings, though they’re increasingly popular for residential applications due to their lower cost.
The installation process is relatively straightforward, which explains both the appeal and the risk. Panels overlap by one or two ribs, and self-tapping screws with rubber washers fasten them directly to the roof deck. Sounds simple, but here’s where many installations go wrong.
Fastener placement has to be precise. Screws go in the flat areas between ribs, never on the raised portions. They need to hit the underlying structure—missing a rafter or purlin means that screw isn’t holding anything. The torque matters enormously. Over-tighten and you compress the rubber washer too much, creating a leak point. Under-tighten and you’ve got a gap where water can seep through. Most homeowners can’t tell the difference by looking, but your roof will show you the consequences within a few years.
Proper steel sheet metal roofing installation also requires careful attention to the overlap sequence. You start at the edge opposite prevailing winds so that overlaps face away from weather. Each panel needs to overhang the eave by 1-2 inches for proper water drainage. The first panel has to be perfectly square to the roof edge, or every subsequent panel will be off, creating what installers call “sawtoothing” where panels meet at slight angles instead of running parallel.
Temperature matters during installation too. Metal expands and contracts with heat. Installing panels on a 90-degree summer day means they’ll contract in winter, potentially backing out fasteners. Experienced contractors account for this, leaving appropriate gaps and using fasteners designed for thermal movement. Inexperienced ones don’t, and homeowners discover the problem when screws start popping or panels buckle.
The underlayment beneath steel sheet metal roofing can’t be just any product. Granulated underlayment designed for asphalt shingles will damage metal panels as they expand and contract, rubbing against those granules and wearing through protective coatings. You need smooth synthetic underlayment rated for metal roofing. This detail alone separates contractors who understand metal roofing from those who don’t.
Steel Tile Roofing Systems and Installation Considerations
Steel tile roofing offers homeowners the aesthetic appeal of traditional clay or concrete tile without the extreme weight or fragility. These systems use formed steel panels that replicate tile profiles, providing dimensional depth and shadow lines that mimic authentic tile roofing.
The installation process for steel tile roofing differs from both flat steel sheet systems and standing seam profiles. Most steel tile systems require installation over solid deck applications rather than open framing. The deck must be clean, level, and square—any irregularities will show through the finished roof and can compromise weather-tightness.
Steel tile panels typically interlock along their edges, creating a continuous surface that sheds water effectively. The interlocking mechanism varies by manufacturer, but most use a combination of overlapping edges and concealed fasteners. Unlike exposed fastener systems, you won’t see rows of screws across the roof surface. Instead, fasteners attach at designated points along panel edges, hidden by the next course of tiles.
Proper steel tile roofing installation requires careful attention to starter courses and edge details. The first row establishes the pattern for the entire roof, so alignment is critical. Most systems use specialized starter strips or trim pieces at eaves and rakes to create clean transitions and ensure proper water flow. Ridge caps and hip treatments require specific accessories designed to maintain the tile aesthetic while providing weather protection.
The weight advantage of steel tile roofing compared to traditional clay tile is significant—often 80% lighter. This means most homes can support steel tile without structural reinforcement, unlike clay tile which may require additional framing support. However, proper attachment still matters. The lighter weight doesn’t mean you can cut corners on fastening or underlayment.
Coastal applications in areas near saltwater benefit from aluminum steel tile options rather than standard steel. The corrosion resistance of aluminum extends the lifespan in harsh marine environments. Union County, NJ isn’t coastal, but understanding material options helps you evaluate contractor recommendations.
Color and finish options for steel tile roofing have expanded significantly. Premium powder-coat applications and PVDF paint systems provide fade resistance and durability that surpasses traditional tile. Some manufacturers offer “Hi-Def” color treatments that create depth and contrast, enhancing the dimensional appearance of the tile profile.
Installation complexity for steel tile roofing falls between basic exposed fastener systems and mechanical seam standing seam systems. It’s more involved than screwing down corrugated panels, but less demanding than field-seaming standing seam profiles. This middle ground often makes steel tile roofing an attractive option for homeowners who want concealed fasteners and distinctive appearance without the highest-tier installation costs.
Want live answers?
Connect with a USA Home Remodeling LLC expert for fast, friendly support.
Standing Seam Metal Roof Systems Installation Process
Standing seam metal roof systems represent the premium tier of metal roofing, offering maximum weather-tightness, longevity, and clean aesthetics. The installation process is more complex than exposed fastener systems, which is why you see significant cost differences and why contractor expertise matters so much.
The defining characteristic of standing seam systems is the raised vertical seams where panels connect. These seams stand up from the flat panel surface, typically 1-2 inches high, creating the distinctive linear appearance. All fasteners hide beneath these seams, either attached to clips or concealed within the panel legs themselves.
Before laying any standing seam panels, the roof deck preparation is critical. The surface must be solid, clean, and properly ventilated. Any existing roofing material typically needs removal, though some building codes allow installation over a single layer of shingles if the deck is sound. Proper underlayment installation comes next—synthetic products designed for high temperatures that metal roofs can reach.
Snap Lock Standing Seam Installation Techniques
Snap lock standing seam systems use panels with male and female legs that literally snap together during installation. This design eliminates the need for mechanical seaming tools, making installation faster and less labor-intensive than traditional mechanically seamed systems.
The process starts with clip installation. Concealed clips fasten to the roof deck at specified intervals, typically every 12-24 inches depending on wind load requirements and manufacturer specifications. These clips have a raised portion that the panel’s male leg will snap over, securing the panel while allowing for thermal movement.
The first panel is critical. It needs to align perfectly with a chalk line snapped using the 3-4-5 method to ensure it’s square to the roof edge. Any deviation here multiplies across the entire roof. The panel’s edge overhangs the eave by about 1 inch to direct water into gutters. Once positioned, you snap the female leg over the clips, working from bottom to top.
Subsequent panels install by engaging the male leg into the previous panel’s female leg. Light hand pressure, foot pressure, or taps with a rubber mallet lock the panels together. You’ll hear and feel when the connection is secure—the panel should snap into place with resistance, then hold firm. If it snaps together too easily or feels loose, something’s wrong with panel alignment or clip placement.
Snap lock systems work best on roof slopes of 3:12 or greater. Below that pitch, water can accumulate and potentially infiltrate the seams, especially during heavy rain or snow melt. This slope limitation is important for Union County, NJ homes, where roof designs vary significantly. If your roof has sections with lower slopes, snap lock may not be appropriate for those areas.
Panel layout planning prevents problems before they start. You need to ensure that roof penetrations—vent pipes, chimneys, skylights—land in the flat portions of panels, not on the raised seams. This requires measuring and potentially starting with a narrower first panel to shift the layout. Experienced installers also plan for equal-width panels on both edges of the roof rather than ending with a narrow sliver on one side.
The trim and flashing details make or break a snap lock installation. Eave trim, gable trim, ridge caps, and valley flashings all require specific installation sequences and proper integration with the panel system. Z-flashing often runs along ridges to provide attachment points for ridge caps without penetrating the panel surface. Each trim piece needs proper overlap, sealant application, and secure fastening.
Temperature considerations during snap lock installation are less critical than with exposed fastener systems since the panels can move on their clips. However, extreme cold can make panels brittle and difficult to snap together, while extreme heat can cause expansion that affects alignment. Most contractors prefer moderate temperatures for standing seam installation.
Mechanical Seam Metal Roof Installation and Performance
Mechanical seam metal roof systems represent the most weather-tight option in metal roofing. Instead of snapping together, the panels’ vertical legs are crimped together using a seaming tool—either hand-operated or power-driven. This creates a folded seam that’s virtually impervious to water infiltration.
The two types of mechanical seams are single lock and double lock. Single lock folds the panel legs once at 90 degrees. Double lock folds them once, then folds the seam down again to create a full 180-degree fold. Nearly all residential mechanical seam installations use double lock for maximum weather protection.
Installation begins similarly to snap lock systems with proper deck preparation, underlayment, and clip placement. However, the clips for mechanical seam systems differ. They’re designed to be crimped into the seam during the seaming process, becoming an integral part of the connection. Expansion clips allow for thermal movement on longer panel runs, preventing buckling or panel distortion.
Panel installation requires more precision than snap lock because you can’t simply snap and move on. Each panel’s legs must align perfectly with the previous panel before seaming. The seaming tool—whether hand-operated or power-driven—travels along the seam, progressively crimping the metal together. Power seamers are faster and create more consistent seams, but they require skill to operate correctly. Uneven pressure, improper speed, or incorrect tool settings can damage panels or create weak seams.
The major advantage of mechanical seam systems is their ability to handle low-slope applications. While snap lock systems require 3:12 minimum slope, double-lock mechanical seam roofs can go down to 0.5:12 or 1:12 depending on the profile and climate. This makes them suitable for nearly flat commercial roofs and residential applications with complex roof geometries.
Weather-tightness is the other significant advantage. The crimped, folded seam creates a barrier that water simply can’t penetrate under normal conditions. Even in heavy rain, high winds, or ice dam situations, properly installed mechanical seam roofs resist leaks far better than other metal roofing systems. This performance comes at a cost—both in materials and installation labor—but for many Union County, NJ homeowners, the peace of mind justifies the investment.
The installation timeline for mechanical seam roofs is longer than snap lock or exposed fastener systems. Seaming each panel connection takes time, especially on complex roofs with multiple planes, valleys, and penetrations. A roof that might take two days with snap lock panels could take four or five days with mechanical seaming. However, you’re paying for a roof that can last 50-70 years with minimal maintenance.
Repairs on mechanical seam roofs are more involved than other systems. If a panel gets damaged, you can’t just pop it out like you might with snap lock. The seams have to be un-seamed using specialized tools, the damaged panel removed, a new one installed, and then re-seamed. This complexity is worth noting, though panel damage is rare given the durability of the system.
Thermal movement accommodation is built into mechanical seam systems through the use of floating clips. These clips allow panels to expand and contract with temperature changes without stressing the seams or fasteners. This is particularly important on long panel runs—anything over 25 feet should definitely use expansion clips. In Union County’s climate, where temperature swings can be significant, proper thermal movement allowance prevents problems down the road.
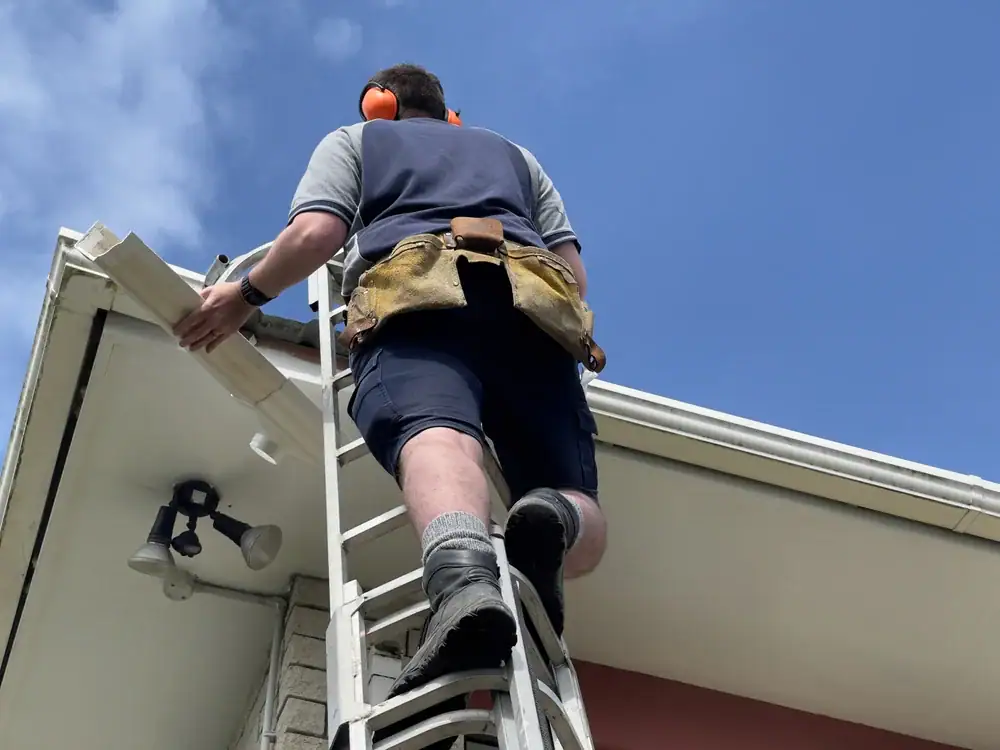
Choosing Professional Installation for Your Metal Roofing Project
Laying metal roofing correctly requires more than following manufacturer instructions. It demands understanding how different systems perform, recognizing site-specific challenges, and having the experience to solve problems before they become failures. The difference between a metal roof that protects your home for decades and one that needs repairs within years often comes down to installation quality.
You’ve seen how steel sheet metal roofing, standing seam metal roof systems, steel tile roofing, and mechanical seam metal roof options each require different approaches, materials, and expertise. The wrong underlayment, improper fastener torque, inadequate thermal expansion allowance, or poor flashing details can compromise any of these systems.
For Union County, NJ homeowners, choosing a contractor with proven metal roofing expertise, manufacturer certifications, and transparent communication makes all the difference. We bring a decade of experience, family-driven service, and the technical knowledge to install your metal roof correctly the first time—because that’s the only time that matters.